A liquid rubber job that does not harden on schedule is not a cosmetic nuisance; it ties up roof access, holds a jig out of service, traps dirt in the film, and sometimes gets walked on before it has built enough strength. Then the real cost shows up: rework, solvent cleaning, scrapped parts, delayed handover, or a pump base that has to be stripped because someone believed “dry to touch” meant “ready for load.” The fix is to judge the material by its chemistry, film thickness, temperature, humidity, and the hardness you actually need after cure.
Yes, liquid rubber does go hard, but it usually cures into flexible rubber rather than a rigid plastic. Depending on formulation and conditions, it may skin over in 30 minutes to 4 hours, fully cure in 24 hours to 7 days, and finish anywhere from Shore A 10 to Shore A 90.
That wide spread is where people get caught. The same phrase, “liquid rubber,” can mean a soft waterproofing membrane, a brush-on repair compound, a mold-making elastomer, or a firmer industrial coating. One will stay gummy if applied too thick in cold weather; another will cure firm enough to feel almost like a molded rubber pad. The difference is not marketing language. It is cure mechanism, solids content, film build, and shop conditions.
What liquid rubber is made to become after curing
“Liquid rubber” is not one material. On a plant floor, that label can mean a brush-grade roof coating, a spray-applied corrosion barrier, a pourable mold rubber, a two-part casting compound, a trowel-grade crack filler, or a dip coating for a tool handle. The common point is simple: it starts fluid enough to place, level, wet the surface, or fill a cavity. After cure, the useful product is no longer a liquid. It is an elastomer.
That distinction matters in procurement. Buying “liquid rubber” without specifying the cured property is like buying “metal” without saying whether you need aluminum sheet or hardened tool steel. The final hardness is designed into the formulation, not discovered by luck after the drum is opened.
Liquid rubber is normally engineered to cure into an elastomer, not into a brittle plastic or a permanently wet coating.True
Most liquid rubber products are formulated with polymers, curing systems, fillers, and additives that create a flexible rubber-like network after application. The degree of softness or firmness depends on the chemistry and formulation.
The chemistry sets the starting behavior
Latex rubber products are often water-based and common in brushable coatings, dipped films, some mold-making uses, and flexible waterproof layers. They can feel soft and stretchy after the water leaves and the rubber particles coalesce. They are handy where low odor and easy cleanup matter, but they are not automatically the best choice for oil, solvent, or high-temperature exposure.
Polyurethane rubber is a broad family. A soft two-part polyurethane might be used for mold-making, vibration pads, or flexible casting. A tougher version can end up in wheel repairs, abrasion-resistant linings, or impact pads. Polyurethane can be excellent against wear, but moisture control during storage and mixing is not a small detail. I have seen opened isocyanate-side containers ruined because someone left the lid loose near a wash bay.
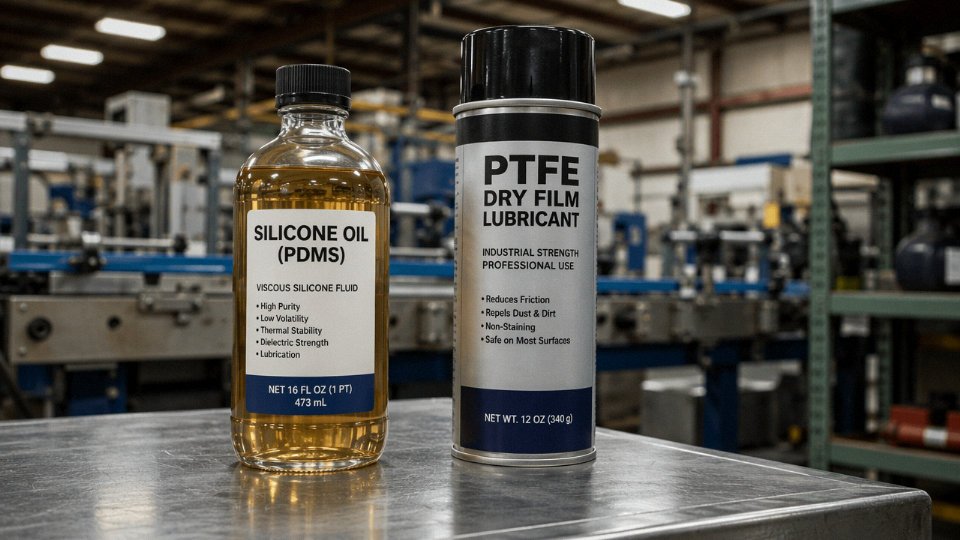
Silicone rubber cures into a very stable elastomer, usually chosen when heat, UV, weathering, or release properties matter. Mold shops like silicone because it separates well from many casting materials. Maintenance teams use it around thermal movement joints and some gasket repairs. It is not usually the cheap option, and adhesion to certain substrates needs proper primer or surface prep.
EPDM-based liquid membranes are common in roof and waterproofing work. Their target is not “hard” in the way a wheel tread is hard. The target is a flexible, weatherable sheet formed in place, able to move with a roof deck through daily thermal cycling. In hot sun, a black membrane can see much higher surface temperature than the air temperature, and that expansion-contraction cycle punishes the wrong coating.
Neoprene-type coatings sit in the middle ground for many industrial uses: flexible, reasonably tough, and often selected for protective coatings, belting repairs, and general rubberized layers. Bitumen-modified elastomeric coatings are another animal again. They are common in waterproofing and corrosion protection, especially where cost and film build matter, but they may stay softer or more temperature-sensitive than a pure elastomer system.
The liquid phase is only the installation method
The wet state is there so the material can be pumped, sprayed, brushed, rolled, poured, or troweled. Once placed, the job of the formulation is to form a continuous elastomeric network.
Skin-over may happen in roughly 30 minutes to 4 hours, depending on the chemistry, film thickness, humidity, temperature, and airflow. That skin can fool people. Under it, the body of the coating may still be uncured, solvent-rich, or weak. Full cure is more often in the 24-hour to 7-day range, with thick castings, cold floors, deep cracks, and low-airflow corners taking longer. A 3 mm coating on a warm, ventilated panel is not the same job as a 25 mm pour into a cold steel mold.
Wrong assumption, real consequence: a crew coats a floor crack at the end of shift, sees a dry-looking surface the next morning, and drives a pallet jack over it. The top tears, the core smears, dirt gets embedded, and now the repair needs cutting out instead of a light touch-up.
Hardness is a formulation choice
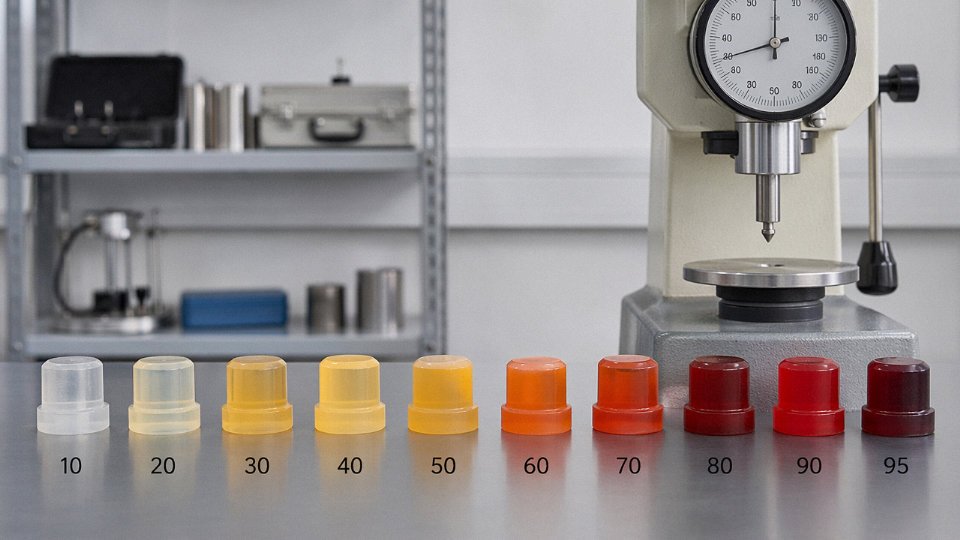
Cured liquid rubber can land anywhere from about Shore A 10 to Shore A 90. That range depends on polymer type, crosslink density, filler loading, plasticizer level, cure package, reinforcement, and the ratio accuracy of two-part systems. Shore A 10 feels gel-like and very compliant. Shore A 90 is firm, close to a hard industrial rubber, though still not the same as rigid plastic.
Manufacturers tune hardness several ways. A flexible polymer backbone gives movement and low-temperature bend. More crosslinks usually raise hardness, tear strength, and chemical resistance, but too much can make the product less forgiving under movement. Fillers such as carbon black, silica, mineral powders, or fibers can add body, abrasion resistance, cost control, or dimensional stability. Plasticizers soften the cured material and help application, but poor choices can migrate, stain, or weaken adhesion. Catalysts and curatives control reaction speed and network formation; too fast can trap bubbles or shorten pot life, too slow can leave a job vulnerable to rain, dust, or early traffic.
Reinforcement additives matter more than some buyers expect. A roof membrane may include fibers so it bridges small cracks without splitting. A corrosion barrier may use platelet fillers to slow moisture and oxygen diffusion. A tool handle dip coating may be tuned for grip, not load-bearing strength. A gasket repair compound needs compression recovery and chemical compatibility, not just a nice black color.
Match the cured rubber to the duty
| Use case | What the cured material should become | Practical buying warning |
|---|---|---|
| Waterproof roof membrane | Soft to medium elastomeric film that tolerates movement and UV | Check wet-film thickness, primer need, ponding-water limits, and cure time before rain |
| Mold-making rubber | Flexible, tear-resistant rubber with release behavior | Hardness affects demolding; too firm can damage fragile patterns |
| Tool handle coating | Tough, grippy elastomer skin | Solvent and sweat resistance matter more than maximum hardness |
| Gasket repair compound | Compressible rubber with recovery | Oil, coolant, steam, or chemical exposure decides the chemistry |
| Floor crack sealant | Flexible filler that bonds to concrete edges | Cold slabs slow cure; dusty cracks kill adhesion |
| Vibration pad | Elastic body with controlled deflection | Too soft bottoms out, too hard transmits vibration |
| Corrosion barrier | Continuous rubbery film with low permeability | Pinholes, poor edge coverage, and rushed recoating cause failures |
In practice, the smart specification starts with the cured elastomer: Shore hardness range, elongation, tear strength, service temperature, chemical exposure, adhesion method, and allowable cure window. The liquid handling properties come next. If the cured rubber is wrong, easy application only gets you to failure faster.
How curing turns a liquid into a solid elastomer
Liquid rubber does not become “hard” by one single route. On the floor, the word curing gets used for several different mechanisms, and mixing them up is a good way to get soft seams, blistered coatings, or a drum of material that behaved perfectly in the lab but failed on a cold roof or inside a pump casing.
At the simplest level, a liquid rubber starts as a mobile system: polymer chains, reactive prepolymers, fillers, plasticizers, solvents or water, pigments, and cure agents depending on the product. Curing turns that mobile system into a rubber network. The key change is crosslinking, where molecular bridges form between polymer chains. Before those bridges form, the material can flow, slump, level, or soak into a substrate. After enough bridges form, the same material becomes dimensionally stable. It may still stretch a long way, but it no longer behaves like a liquid.
That distinction matters. A cured elastomer can be Shore A 10, almost gel-like and very flexible, or up around Shore A 80 to 90, closer to a firm industrial rubber wheel or gasket. Both are “solid.” Neither needs to become rock-hard to be properly cured.
Evaporation is not the same as cure
Some liquid rubber coatings harden partly because a carrier leaves the film. In solvent-borne products, mineral spirits, xylene-type blends, ketones, or other volatile carriers evaporate. In water-based systems, water leaves first, then the polymer particles coalesce into a continuous rubbery film. That first stage can be quick. A coating may skin over in roughly 30 minutes to 4 hours, depending on chemistry, wet film thickness, humidity, air movement, and temperature.
But a dry surface is not proof of a cured body.
In a thin brushed coating with airflow across it, evaporation may be fairly uniform. In a heavy pour, a corner joint, a lap seam, or a coating applied inside a steel trough with poor ventilation, the top surface can close off while the lower material still contains solvent or water. The surface feels dry to a gloved finger. Underneath, it is still soft, swollen, and weak. Press it with a thumbnail the next day and it dents. Put it into service too early and it may blister when the trapped carrier warms up, or it may lose adhesion because the interface never reached the right condition.
I have seen maintenance crews chase this by adding heat guns. Sometimes that helps. Sometimes it just bakes a skin on top and makes the trapped-solvent problem worse.
Moisture, two-part, heat, and ultraviolet cure behave differently
Moisture-cure rubbers use water vapor from the air, or sometimes moisture from the substrate, as a process input. Many single-component polyurethane and silicone-type products work this way. Cure starts at the exposed surface and moves inward. High humidity can speed the reaction, up to a point. Very dry winter air slows it down. Thick beads and deep joints can take far longer than the label’s tack-free time suggests because moisture has to diffuse through already-cured material.
Two-part systems are different. The cure depends on mixing resin and hardener at the right ratio, then giving the chemical reaction enough time and temperature. Poor mixing leaves streaks or soft pockets. Wrong ratio can leave a permanently tacky mass or a brittle compound, depending on which side is in excess. Static mixers are useful, but only if the first few inches are purged and the operator watches for color uniformity. A rushed cartridge change at 2 a.m. is exactly where these failures come from.
Heat-cure elastomers need elevated temperature to drive the reaction or complete vulcanization. Temperature affects both cure speed and final properties. Too cool, and the reaction crawls or stops short. Too hot, and you can get surface defects, excessive shrinkage, or thermal damage to fillers and nearby components. The correct window depends on the compound, part thickness, tooling, and whether the heat actually reaches the center of the rubber.
Ultraviolet-assisted cure is mostly a surface-access process. It works well where the light can reach the material at the right intensity and wavelength. Shadowed areas, pigmented films, deep sections, and undercuts are risky unless the product has a secondary cure mechanism. UV is fast, but it is not magic.
Why the top can lie to you
The surface of liquid rubber has the easiest job. It sees air, heat, light, and evaporation first. The lower layers have to wait for diffusion, reaction progress, or carrier escape through a film that is already becoming less permeable. That is why a coating can pass a light touch test and still fail a cut test, peel test, or solvent-rub check later.
Typical full cure is often somewhere between 24 hours and 7 days, but that range moves with film thickness, ambient temperature, humidity, substrate temperature, ventilation, and product chemistry. Thick castings, cold slabs, confined joints, and high-build repairs often sit on the long end. Low temperature is a quiet troublemaker; a floor that reads 8 to 12 °C in the morning will not cure like the same product on a 23 °C test panel.
A liquid rubber coating that feels dry on the surface is always fully cured underneath.False
Surface dryness usually means the exposed layer has skinned, evaporated carrier, or started reacting. Full cure through the film can take much longer, especially in thick applications, confined joints, low temperatures, or moisture-cure systems.
Faster drying can create worse rubber
Procurement teams sometimes ask for the fastest-drying grade because downtime is expensive. Fair request. The trap is assuming faster surface drying equals better cure. If solvent leaves too quickly, the surface can skin before the bulk has released its carrier. That can trap solvent, create bubbles, reduce cohesive strength, and weaken adhesion at the substrate. On porous concrete or blasted steel, the first few minutes of wetting are often what give the coating its grip. Flash it off too fast and you may get a neat-looking film that peels like tape.
The better question is not “How fast does it dry?” It is “At our thickness, temperature, humidity, airflow, and substrate condition, when is it ready for the next operation or service load?” That answer is less tidy, but it prevents rework.
How hard liquid rubber gets on the Shore scale
The usual hardness number for cured liquid rubber is Shore A. That is the rubber scale most buyers, maintenance teams, and coating suppliers mean unless they say otherwise. In practical terms, cured liquid rubber can land anywhere from about Shore A 10 to Shore A 90, depending on the polymer chemistry, filler loading, cure ratio, plasticizer package, film thickness, and cure conditions.
At the low end, around Shore A 10 to 20, the cured material feels close to a soft gel or very limp elastomer. It may seal well and move with vibration, but it will mark easily under a fingernail and may not tolerate dragging, scraping, or clamp load. Around Shore A 30 to 50, you are in the territory of flexible membranes, soft gaskets, and many waterproofing-type coatings. By Shore A 60 to 75, the rubber starts feeling like a firm industrial gasket, shoe sole, or tire-like compound. Near Shore A 80 to 90, it is still rubber, but it is not “soft” in the way many people imagine liquid-applied rubber to be. It can resist indentation much better, yet it may lose some conformability on rough flanges or moving joints.
That tradeoff shows up on real equipment.
A soft coating may survive expansion and contraction on a tank roof seam where a hard coating cracks at the edge. A harder grade may survive pallet scuffing on a bund floor where a soft membrane gets chewed up in a month. Right grade, lower maintenance. Wrong grade, patching work during shutdown, wet insulation, product contamination risk, or an operator asking why the “rubber” turned into a sticky mess under forklift traffic.
Everyday feel of Shore A hardness
These comparisons are not calibration standards, but they help during vendor calls and purchase reviews:
| Approximate hardness | What it feels like | Typical buying implication |
|---|---|---|
| Shore A 10 to 20 | Very soft gel, soft rubber band feel | Good movement and sealing; poor scuff resistance |
| Shore A 30 to 40 | Flexible rubber band or soft membrane | Common for waterproofing and flexible coating duties |
| Shore A 45 to 60 | Pencil eraser to softer shoe sole | Better handling strength; still reasonably flexible |
| Shore A 60 to 75 | Car tire tread range, firm shoe sole | Useful where wear and indentation matter |
| Shore A 75 to 90 | Hard industrial gasket or dense rubber pad | Better load resistance; may not conform well to irregular surfaces |
The exact feel depends on thickness. A 1 mm coating at Shore A 60 can feel less substantial than a 10 mm pad at Shore A 45, because your finger or a wheel load interacts with the backing underneath. On steel, concrete, wood, or foam insulation, the same rubber hardness can behave differently. Procurement often misses that point because the number on the data sheet looks self-contained. It is not.
Shore D is not the normal scale for flexible liquid rubber
You may see Shore D on some rigid elastomeric hybrids, polyurethane cast systems, or plastic-like coatings. That scale is meant for harder materials. If a supplier quotes Shore D for a product being sold as a flexible liquid rubber membrane, ask for clarification. It may be a very stiff system, or the wrong test scale may have been copied into the literature.
In plant language: Shore D material may protect a surface, but do not assume it will bridge moving cracks, seal a vibrating joint, or behave like a rubber liner. Some systems are closer to tough plastic than flexible rubber once cured. That can be fine for abrasion trays or wear surfaces. It is not fine for a roof penetration that opens and closes every hot afternoon.
A higher Shore hardness number means the cured liquid rubber is stronger in every important way.False
Shore hardness measures resistance to indentation. It does not directly measure tensile strength, tear resistance, elongation, compression set, abrasion resistance, adhesion, or chemical resistance. A softer rubber can outperform a harder one in movement and sealing, while a harder rubber may perform better under scuffing or point load.
Hardness is only one line on the data sheet
A good technical data sheet should give more than Shore hardness. Before issuing a purchase order, I would want to see at least:
- Shore A hardness, including test standard if available, usually ASTM D2240 or ISO 48-4.
- Tensile strength, because a hard rubber can still be weak if the cured network is poor or badly filled.
- Elongation at break, especially for crack bridging, expansion joints, tank seams, and vibrating equipment.
- Tear resistance, for edges, bolt holes, and places where a nick can grow.
- Compression set, if the material will sit under clamp load as a gasket or pad.
- Abrasion resistance, where boots, tires, product flow, slurry, or cleaning tools touch it.
- Adhesion to the actual substrate, not just “excellent adhesion” in brochure language.
- Service temperature range, including short excursions, washdown heat, freeze-thaw exposure, or summer roof temperature.
- Chemical resistance, matched to the real fluids: oils, diesel, acids, caustic, solvents, chlorinated water, animal fats, process cleaners.
Hardness should be selected for the duty, not by instinct. For a flexible waterproofing membrane, I would usually start looking in the softer to mid Shore A range, then confirm elongation and adhesion. For an industrial floor patch or wear-facing coating, I would move harder, then check abrasion and chemical exposure. For a gasket-like liquid-applied seal, I would care as much about compression set and surface conformity as the hardness value itself.
One small procurement warning: do not compare an uncured sample squeezed between fingers with the final Shore rating. Skin-over may happen in 30 minutes to 4 hours, and full cure may take 24 hours to 7 days or longer in thick sections or cold weather. A sample tested too early can read softer, feel tacky, or fail under load even though the product would have passed after a proper cure. That mistake has caused plenty of unnecessary supplier arguments on job sites. Give the material the cure window it was designed for, then judge it.
How long liquid rubber takes to go from tacky to service-ready
The label cure time is a starting point, not a production plan. On a clean test panel at roughly room temperature with controlled film thickness, many liquid rubber coatings skin over in about 30 minutes to 4 hours. Out on a roof, inside a tank, on a cold steel frame, or poured into a deep mold, that same material can behave very differently.
A thin brush or spray coating may be tack-free within a few hours. A heavy trowel-applied membrane, a fillet around a penetration, or a pourable rubber section can need 24 hours to 7 days before it is ready for real service. Thick castings, low ambient temperature, low airflow, high solvent load, and shaded or enclosed work all push the long end of that range.
The stages are not the same thing
Plant crews often use “dry” and “cured” as if they mean the same condition. They do not. That mistake causes fingerprints, blocked rolls, blistered recoats, and sometimes a complete strip-and-redo.
| Stage | What it means in practice | Typical range | What it depends on |
|---|---|---|---|
| Open time | Time before the applied film starts changing noticeably | Minutes to a few hours | Chemistry, solvent or water content, temperature, airflow |
| Working time | Time available to spread, level, tool, or embed fabric | Often 10 minutes to 2 hours | Pot life, film thickness, substrate temperature, batch size |
| Skin-over time | Surface forms a skin but material below may still be soft | About 30 minutes to 4 hours | Humidity, film build, airflow, resin type |
| Tack-free time | A glove or light touch no longer pulls strings or leaves residue | Roughly 1 to 12 hours for many thin coatings | Film thickness, ventilation, temperature, solvent escape |
| Recoat window | Safe period to apply the next layer without sanding or poor intercoat bond | Often same day to a few days | Manufacturer chemistry, contamination, surface oxidation |
| Light-duty cure | Can handle gentle traffic, masking removal, or careful assembly | Commonly 12 to 48 hours | Load level, contact pressure, temperature, coating thickness |
| Full cure | Final hardness, bond strength, chemical resistance, and water resistance are developed | About 24 hours to 7 days, sometimes longer | Crosslink rate, section thickness, moisture access, heat history |
That table is not a substitute for the technical data sheet, but it is closer to how the job actually feels on the floor.
Cold conditions slow almost everything
Low temperature is the most common reason a liquid rubber job runs late. Chemical reaction rates drop. Viscosity rises. The material drags under the roller instead of leveling, so applicators leave ridges and thick edges. Those ridges cure last.
Cold substrates are worse than cold air. A pail warmed in the shop can still be spread onto steel sitting at 8 to 12 °C, and the coating immediately thickens. Solvents stay trapped longer. Water-based systems release water slowly. Bond strength lags even if the surface feels dry. I have seen crews pass a light touch test in the afternoon, then find heel marks the next morning because the underside of the film never caught up.
Watch temporary heaters as well. Direct-fired propane heaters add moisture to the air and can create condensation on steel or concrete. Warm air over a cold substrate is a classic way to get a film that looks acceptable and then blisters later.
Humidity can help or hurt
Humidity is not automatically bad. Some moisture-cure liquid rubbers need atmospheric moisture to react, so very dry air can slow the cure, especially in thick films where the center is starved of moisture. A moderate humidity range often helps those products skin and build strength.
Water-based coatings are different. High humidity slows water evaporation. The film may stay soft, milky, or pressure-sensitive far longer than expected. On cool mornings, condensation can sit on the substrate as an invisible release layer. Put rubber over that and the first warm cycle may lift it.
Solvent-based materials have their own problem: high film build plus poor airflow traps solvent. The surface skins, the underside stays swollen, and the coating later bubbles, prints, or smells sharp when cut. If the area still smells strongly of solvent after it is supposedly cured, do not bury it under another coat or put it into service.
A liquid rubber coating that is tack-free at the surface may still be under-cured below the skin.True
Skin formation, solvent release, water evaporation, and crosslinking do not always occur at the same rate through the full film thickness, especially in heavy applications or cool conditions.
A practical readiness check before loading it
For non-critical work, experienced applicators often judge by touch and appearance. For an industrial lining, gasket surface, vibration pad, containment area, or anything exposed to chemicals or standing water, use a tighter sequence.
First, inspect the surface under good light. Look for gloss variation, wet edges, pinholes, wrinkles, bubbles, milky patches, or soft corners near seams and penetrations. Those areas usually tell the truth before the open flat areas do.
Second, press with a clean nitrile-gloved finger. Do not jab it with a screwdriver. A ready coating should resist pressure without stringing, smearing, or showing a permanent fingerprint under light force.
Third, check a sample coupon made at the same time with the same film thickness. Cut the edge and inspect the cross-section. If the surface is firm but the center is gummy, the asset is not ready.
Then smell the cut edge. A faint material odor may be normal, but a strong solvent smell means retention. Give it more time, warmth, and airflow if the product allows it.
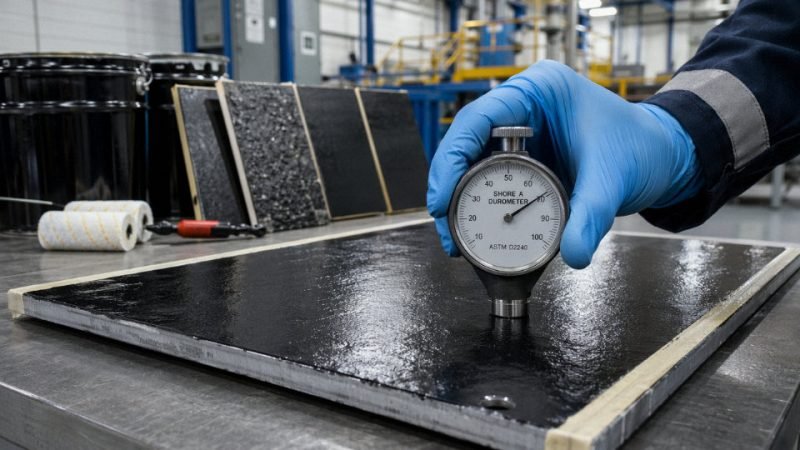
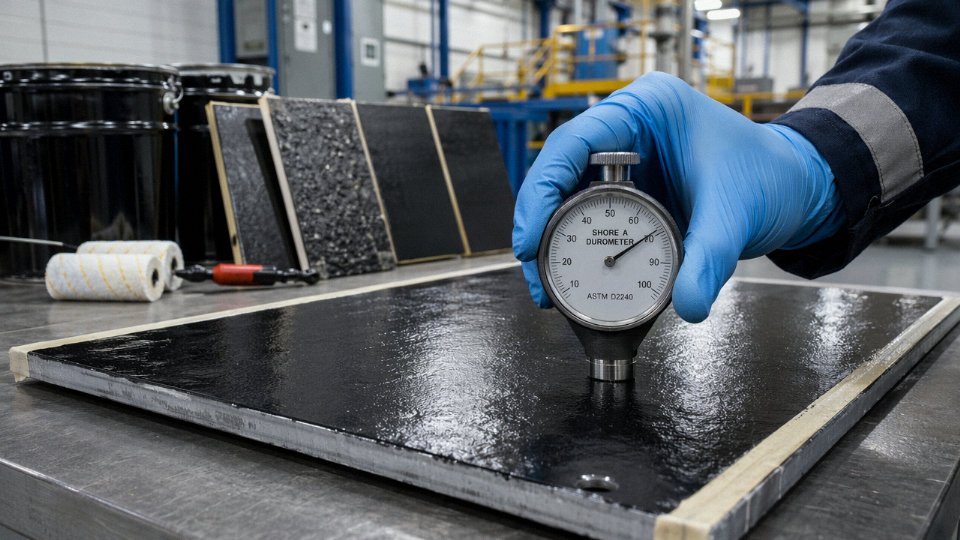
For performance-critical work, confirm hardness with a Shore A durometer after the specified cure period. Typical cured liquid rubber products can fall anywhere from Shore A 10 to Shore A 90, depending on formulation. The actual acceptance target should come from the product grade and service duty, not from a thumb press by the night-shift supervisor.
Why liquid rubber stays soft, sticky, or uncured
A liquid rubber film that stays tacky after the expected cure window is not “just taking its time” in every case. Sometimes it is slow because the slab is cold or the film is thick. Sometimes the chemistry has been damaged, diluted, or applied onto a surface it can never bond to properly. The fix depends on which failure mode you are looking at.
On a plant floor, I treat uncured rubber as a process problem first, not a product argument. Check the batch, the mix, the substrate, the weather, and the film build before anyone starts stripping square meters of coating with a scraper and a bad mood.
Formulation and handling problems
Expired material is a common one. Some liquid rubber systems still look usable in the pail after shelf life has passed, but the emulsion, solvent balance, or reactive components may already be out of tolerance. The result can be a film that skins over but stays weak underneath, or a surface that remains greasy for days. Shelf life depends on the chemistry and storage temperature; a drum stored in a hot container yard ages much faster than one kept in a controlled storeroom.
Frozen emulsion is another quiet killer. Water-based rubber coatings that have frozen in transit may thaw and stir back to something that looks acceptable. Often they are not. Broken emulsion can leave grainy material, poor coalescence, pinholes, or permanent tack. If a pail has a cottage-cheese texture, separated water that will not reincorporate, or rubbery lumps around the lid, do not “save it” on a critical roof, bund, or tank base.
Two-part products bring their own traps: wrong catalyst ratio, eyeballed mixing, partial kits, or poor scraping around the pail wall. Mix by weight when the technical data sheet gives a weight ratio. Volume ratios can be misleading if Part A and Part B have different densities. Incomplete mixing commonly leaves soft streaks, gummy patches, or areas that cure only where the mixer actually reached. A low-speed paddle and a clean transfer pail are cheap insurance.
Contamination also matters. A little diesel mist, hydraulic oil, silicone spray, cutting fluid, release agent, or incompatible thinner can poison cure or prevent film formation. I have seen contractors thin a product “just to make it roll nicer” with whatever solvent was nearby. That is gambling. If the manufacturer does not list the thinner, assume it is wrong.
Some failures are simpler: the selected product is not meant for that substrate or exposure. A foundation coating is not automatically suitable for a chemical bund. A roof membrane may not survive oily wastewater. A flexible waterproofing rubber may stay too soft under forklift traffic.
If liquid rubber remains sticky after the normal full-cure window, adding heat may help only if the chemistry is intact and the film is not contaminated or misapplied.True
Low temperature and poor airflow can delay cure, but expired product, wrong catalyst ratio, incompatible solvent, or surface contamination can leave the film permanently defective.
Environmental causes that slow or stop cure
Temperature is usually the first field variable to check. Many liquid rubber coatings cure reasonably at mild ambient conditions, but cold steel, cold concrete, or night temperatures near the lower application limit can stretch a 24-hour cure into several days. Thick cast areas can take longer again because the surface cures first while the lower layer has limited access to air, moisture exchange, solvent release, or reaction heat, depending on the system.
Ventilation is not a paperwork issue. Solvent-borne and moisture-curing systems both suffer in dead air, just in different ways. In a sealed pit, valve chamber, or under-machine cavity, vapors can sit over the coating and slow release. Some moisture-curing products need humidity, but trapped condensation is not the same as controlled moisture. That distinction gets missed.
Film thickness is another frequent offender. A label may permit a wet-film thickness in the range of a few hundred microns to several millimeters depending on product type, but pushing beyond the stated maximum can trap solvent, water, or unreacted material. The top feels dry. The underside stays soft. Then a mechanic kneels on it and leaves a perfect imprint.
Rain exposure and dew point problems create similar grief. If the substrate is within roughly 2 to 3°C of dew point, condensation can form as a nearly invisible film. Rubber applied over that film may blister, foam, wash out, or never anchor properly. Early-morning roof jobs are notorious for this. The surface looks dry until you put a hand on it.
Some specialized systems also need sufficient ultraviolet exposure or a defined trigger to cure correctly. Using those materials in shade, under cladding, inside ducts, or below equipment can leave them undercured even though the same product works fine outdoors.
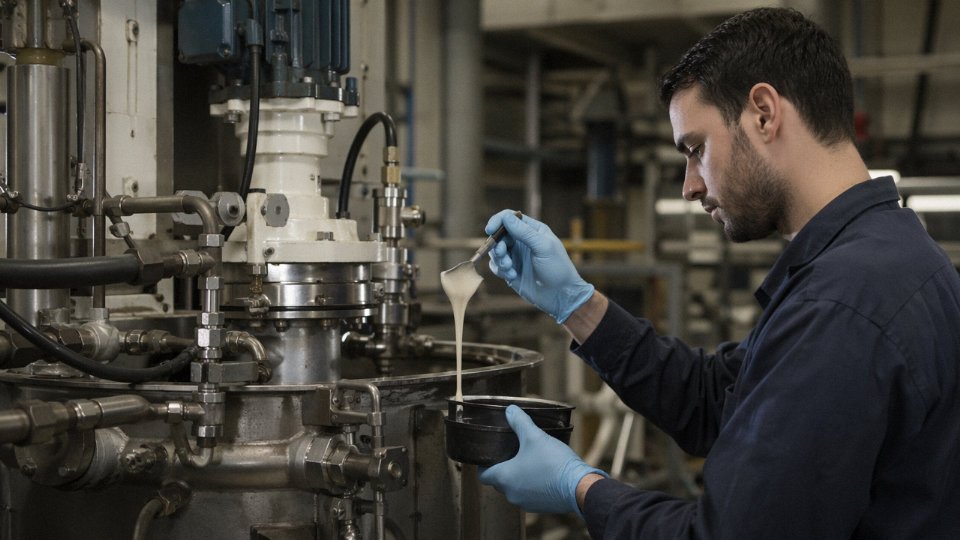
Substrate conditions that defeat cure or adhesion
Rubber will not make dirt into a structural surface. Oil, grease, wax, silicone residue, loose rust, chalked paint, concrete laitance, and old sealant residue all interfere. Silicone is especially frustrating because tiny traces from sprays or previous sealants can cause fisheyes and non-wetting. You may not see it until the coating pulls back like water on a polished car bonnet.
Concrete brings pH and moisture issues. Fresh or poorly washed alkaline surfaces can attack some systems or prevent proper bonding. Laitance needs mechanical removal, not a hopeful wipe with a rag. Damp wood can feed moisture into the film from below for days. Flexible plastics may release plasticizer into the rubber, leaving a soft boundary layer or sticky surface; PVC cable jackets and some flexible liners are common suspects.
Application errors and controlled troubleshooting
Second coats applied too early can trap uncured material between layers. That often looks acceptable for a day, then wrinkles, blisters, or stays rubbery under light pressure. Respect the recoat window, including the maximum interval if the product needs chemical bonding between coats. Porous surfaces usually need primer or a thinned first coat approved by the supplier; otherwise the coating can pinhole, drain into pores, or cure unevenly.
Before stripping the job, slow down and run a controlled check. Record batch numbers, date codes, ambient temperature, substrate temperature, humidity, dew point, and wet-film thickness if you have it. Prepare a fresh test coupon on clean steel, glass, or primed concrete using material from the same batch. Cure it in a warm, dry, ventilated area. For two-part systems, mix a small sample by weight with a clean scale and compare it against the field area.
If the coupon cures and the job does not, look hard at substrate, thickness, weather, or contamination. If the coupon stays sticky too, suspect product age, freeze damage, mixing ratio, or chemistry. Then call the supplier with data, not just a complaint. A technical data sheet is not bedtime reading, but in this situation it tells you whether you have a recoverable slow cure or a coating that needs to come off.
How to make cured liquid rubber harder or more durable without ruining performance
Once liquid rubber has cured, you usually cannot “make it harder” in any meaningful, controlled way by doing something clever on site. Not safely, anyway. A few systems are designed for post-cure heat exposure, staged cure, or compatible topcoating, but most field-applied coatings and cast elastomers reach the hardness they were formulated to reach. After that, you can protect the surface, reinforce the build, or choose a harder product next time. You cannot turn a Shore A 25 membrane into a Shore A 70 industrial liner with a bucket of powder and a mixer paddle.
Most liquid rubber products cannot be substantially hardened after full cure unless the manufacturer designed the system for post-cure, heat treatment, or compatible overcoating.True
Cured elastomers have already formed their physical or chemical network. Surface coatings can improve wear or ultraviolet resistance, but they do not usually change the bulk hardness of the rubber underneath.
Start with the grade, not the jobsite experiment
The cleanest way to get a harder cured rubber is to buy the correct durometer grade at procurement. That sounds boring. It is also how good plants avoid rework.
If the application needs a firm pad, wear liner, equipment base seal, or industrial gasket-like behavior, specify the target Shore A range before purchase. Many liquid rubber families span roughly Shore A 10 to Shore A 90, depending on chemistry and formulation. A roof membrane may sit in the soft, stretchy end of that range. A trafficable deck coating, tank lining, or molded protective part may need something much firmer.
What I do not like seeing is field “adjustment” with sand, cement, random mineral filler, lacquer thinner, old solvent from the paint cage, or a mystery hardener from another two-part product. It happens. Usually after somebody decides the cured film “feels too soft” and wants to rescue the job.
That rescue can create a worse failure.
Extra filler can starve the binder, create dry pockets, drag the rubber below its designed elongation, and leave weak planes between coats. Solvent can slow cure, swell the polymer, trap bubbles, or reduce adhesion. Unapproved hardeners are worse because they may react too fast, not react at all, or leave brittle, uncured islands. On a roof or tank, that means pinholes and leaks. On a conveyor skirt or pump base, it means chunks breaking out under vibration.
Use reinforcement when you need strength, not fake hardness
Durability is not the same as hardness. In practice, many successful liquid rubber jobs become durable because the system is reinforced, not because the rubber itself is extremely hard.
Common approved reinforcement options include:
| Reinforcement method | Where it helps | Shop-floor caution |
|---|---|---|
| Fabric scrim | Roof seams, corners, penetrations, expansion-prone joints | Must be fully wetted out; dry fabric becomes a leak path |
| Fiberglass mesh | Decks, secondary containment, repair patches | Can print through thin coatings and create sharp edges if poorly embedded |
| Geotextile | Larger roof or containment builds needing thickness and tear strength | Needs enough coating above and below, not just a decorative skim |
| Aggregate broadcast | Walkways, ramps, maintenance access areas | Improves traction and wear, but too much aggregate can make cleaning miserable |
| Compatible primer | Concrete, steel, aged coatings, damp-tolerant systems where allowed | Wrong primer can be worse than no primer; check recoat windows |
| Protective topcoat | Ultraviolet, abrasion, chemicals, standing water, foot traffic | Must be chemically compatible and applied after the base layer is ready |
A typical roof penetration repair might use a liquid rubber base coat, polyester fabric worked into the wet film, a second saturation coat, then a UV-stable topcoat after the cure window. The finished patch may not test much harder in Shore A than the base rubber, but it resists tearing, movement, and sunlight far better. That is the result you wanted.
Topcoats are for exposure, not magic
Abrasion-resistant topcoats make sense on decks, walkways, equipment platforms, tank tops, service aisles, and maintenance paths where boots, carts, hoses, and grit will grind the surface. The best systems usually pair a flexible base with a tougher wear layer. If the topcoat is too rigid, it cracks over joints and moving substrates. If it is too soft, it polishes smooth or wears through.
Ultraviolet-resistant topcoats are common on roofs, exterior tanks, pipe supports, outdoor skids, and exposed machinery covers. Some rubber coatings tolerate sunlight well by themselves. Others chalk, embrittle, or lose surface strength after long exposure, especially in hot climates or near reflective metal. The topcoat choice depends on UV load, temperature cycling, ponding water, chemical splash, and whether people will walk on it.
For tanks and containment areas, chemical compatibility matters more than a nice hard surface. A hard topcoat that softens in diesel, caustic washdown, coolant, or fertilizer solution is not durable. It is just hard for the first week.
Do not harden away the reason you used rubber
There is a trap here. Engineers see a soft coating and assume harder is better. Sometimes it is. Often it is not.
Rubber earns its keep through elongation, crack bridging, impact absorption, vibration damping, and fatigue resistance. Push the system too hard and those properties fall. A very firm coating may look tough during inspection, then split when concrete moves, steel expands in afternoon sun, or a tank shell flexes during filling. I have seen coatings fail beside welds and anchor points not because the product was weak, but because somebody made the repair stack too stiff for the movement underneath.
The right question is not “How do I make it harder?” The better question is: what failure mode am I trying to stop?
If the issue is foot traffic, use aggregate and a wear topcoat. If it is tearing at joints, use fabric reinforcement. If it is UV exposure, specify an exterior-rated topcoat. If it is indentation under equipment feet, buy a higher-durometer compound or a molded pad. If it is chemical attack, change chemistry, not just hardness.
Harder rubber can be the right call. Improvised hardening is where expensive trouble starts.
Choosing the right liquid rubber hardness for real applications
Hardness is only one line on the data sheet. In the field, I would rather see the right combination of hardness, elongation, adhesion, tear strength, chemical resistance, and cure tolerance than chase a high Shore A number that looks “strong” in a purchasing comparison. A Shore A 70 coating can fail early on a moving crack. A Shore A 25 membrane can outlast it for years if it stays bonded and stretches without tearing.
The hardest cured liquid rubber is not automatically the most durable choice.True
Durability depends on the service load. Moving joints, roofs, seals, and vibration-prone repairs often need flexibility and recovery more than maximum Shore hardness.
Waterproofing roofs, gutters, foundations, and ponds
For waterproofing, do not select liquid rubber as if it were a floor paint. Roofs and foundations move. Gutters twist with temperature. Concrete cracks keep opening and closing, especially around cold joints, penetrations, and old patch lines.
For these jobs, prioritize elasticity, adhesion to the actual substrate, ultraviolet resistance, and crack-bridging ability. Hardness usually sits on the softer to mid-range side, often roughly Shore A 20 to 60 depending on chemistry and reinforcement. The right number depends on film thickness, expected movement, sun exposure, water immersion, and whether fabric or fleece is embedded.
A common mistake is putting a firm coating over a damp or dusty concrete foundation wall because it “feels tough” after curing. Then groundwater pressure finds a pinhole, the coating blisters, and the crew blames the product. Surface preparation and vapor conditions matter as much as hardness. On roofs, ponding water and ultraviolet exposure narrow the choices further; some rubbers need a UV-stable topcoat, while others are formulated for direct exposure.
Molds and casting work
Mold rubber is a different conversation. Here, hardness affects demolding force, fine detail pickup, tear resistance, and mold life.
Soft rubber, say around Shore A 10 to 30, is useful for deep undercuts, delicate patterns, and parts with awkward geometry. It peels back without fighting the casting. The tradeoff is lower dimensional stability and, in some cases, faster wear at sharp edges. Medium grades, roughly Shore A 35 to 60, are often a better production choice for flat-backed parts, concrete features, resin castings, or repeat work where the mold needs to hold shape.
A shop making a few decorative castings may accept a softer rubber that releases easily. A production cell pouring abrasive filled resin every shift should care more about tear strength, elongation, and the expected number of cycles. Hardness alone will not tell you whether the lip of the mold tears after ten pulls or after two hundred. Ask for tear strength and abrasion data, then test with the real release agent and casting material. Some release sprays swell certain rubbers; I have seen that turn a good mold into a gummy mess by the end of the week.
Vehicle, marine, and equipment repairs
Repairs on vehicles, boats, pumps, housings, guards, and mobile equipment sit in the messy middle. The coating or patch may see oil mist, diesel, saltwater, vibration, stone impact, hydraulic fluid, sunlight, and winter temperatures. Sometimes all in the same month.
For these repairs, balance flexibility with abrasion and chemical exposure. A soft elastomer may seal a seam well but cut easily if it rubs against a bracket. A harder compound may resist scuffing but crack at a vibrating joint. Service temperature matters too; some rubbers stiffen badly in cold weather, while others soften near engines, exhaust shielding, or sun-heated marine decks.
I would not sign off a maintenance repair around fuel, solvents, hydraulic oil, or bilge contamination without checking compatibility. “Waterproof” does not mean “oilproof.” If the surface sees repeated washdown with caustic cleaner or degreaser, include that in the selection. Procurement teams often miss this because the requisition says only “liquid rubber sealant.” That is not enough information.
Floors, ramps, and walkable surfaces
For floors, ramps, mezzanine patches, and walkable roofs, hardness is a weak shortcut. You need abrasion resistance, slip resistance, traffic rating, coating thickness, and a compatible topcoat system. Foot traffic is one thing. Steel-wheeled carts, pallet jacks, forklift turning, grit from outdoor shoes, and wet boots are another.
A very soft coating can feel grippy on day one and then tear under point loads. A hard smooth coating can become a slip hazard when wet. The better specification calls out the full system: primer, base coat, aggregate broadcast if needed, wear coat, dry film thickness, cure window before traffic, and cleaning chemicals used on site.
Typical selection guide:
| Application | Hardness tendency | What I would check before buying |
|---|---|---|
| Walkable roof membrane | Soft to medium | UV rating, elongation, ponding water approval, reinforcement fabric |
| Loading ramp coating | Medium to firm | Abrasion loss, slip aggregate, tire marking, wet traction |
| Workshop floor patch | Medium | Oil resistance, impact resistance, topcoat compatibility |
| Light-duty balcony surface | Soft to medium | Crack movement, weathering, barefoot comfort, drainage |
Do not let a contractor substitute a plain waterproofing rubber for a traffic surface unless the manufacturer approves that exact use. The wrong choice usually fails at turning points and edges first.
Gaskets, pads, seals, and industrial joints
For gaskets and pads, final hardness must be tied to compression set, fluid compatibility, movement, and dimensional tolerance. This is where factory experience saves money. A rubber pad that feels perfect by hand may take a permanent set after sitting compressed under a motor base for six months. A seal that is too hard may not conform to flange irregularities. Too soft, and it extrudes out of the joint when pressure or bolt load rises.
For static water seals, softer compounds may work well if the joint design supports them. For oil, steam, coolant, acids, alkalis, or food-contact washdown, chemistry drives the choice first. Hardness comes after compatibility. In vibrating equipment, look at recovery and fatigue behavior, not just Shore A. A pump base pad, expansion joint filler, and removable hatch gasket may all be “rubber,” but they are not interchangeable parts.
Dimensional control is the quiet issue. Liquid-applied or cast-in-place rubber can shrink, sag, trap air, or cure unevenly if the section is thick. If the gasket has to hold a tight gap, trial pieces are cheap insurance. Measure cured thickness after the real cure window, not when the surface first feels dry.
Field tests, quality checks, and acceptance criteria for cured liquid rubber
A cured liquid rubber job should not be accepted just because the top no longer feels wet. I have seen coatings that looked fine at 7 a.m. and still had soft material trapped under a skin at noon, usually where someone poured heavy around a drain, under a pipe shoe, or into a corner with poor airflow. Surface dry is not the same as cured-through.
For plant work, the checks should start during application, not after the crew has packed up.
Thickness checks: wet film first, dry film later
Wet-film thickness is the simplest control point and one of the most ignored. Use a wet-film comb while the coating is still open. Press it squarely into the material, pull it out, and read the last wetted tooth against the first dry tooth. It is not laboratory science, but it catches the big mistakes: a roller spread too thin, a squeegee leaving ridges, or a spray pass building twice the intended film around overlaps.
The target wet-film thickness depends on solids content, shrinkage during cure, number of coats, reinforcement fabric, and the service condition. A high-solids rubber membrane may lose little thickness. A solvent or water-based system can shrink noticeably as carrier leaves. That is why the product data sheet and project specification need to be read together, not treated as decorative paperwork.
After cure, confirm dry-film thickness with a suitable gauge. On steel, a magnetic or electronic coating thickness gauge is common. On concrete, timber, plastic, or irregular substrates, readings are trickier; ultrasonic gauges, cut-out coupons, or measured witness panels may be more reliable. In maintenance work, I like witness plates coated beside the job. They give you a flat, known surface for hardness and thickness checks without carving into the actual repair.
Wrong thickness has consequences. Too thin and you get early wear, pinholes, chemical breakthrough, or movement cracks. Too thick in one pass and the surface can skin while the lower layer stays soft, especially in cool weather or stagnant air.
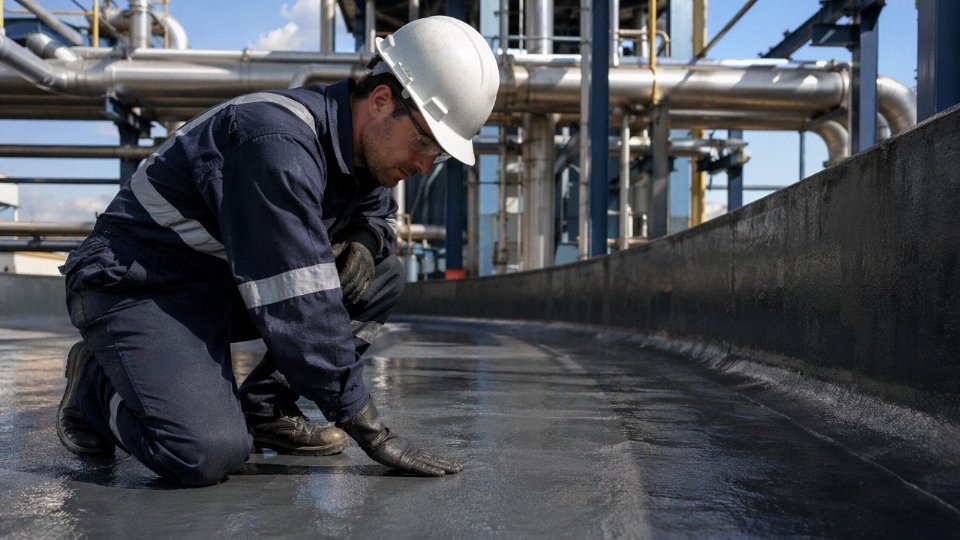
Durometer testing: useful, but easy to misuse
Hardness is normally checked with a Shore A durometer for elastomeric liquid rubber. Cured products can land anywhere from roughly Shore A 10 to Shore A 90 depending on chemistry, filler package, plasticizer level, cure system, and intended use. A soft roof membrane and a firm abrasion-resistant lining should not be judged by the same number.
The test surface must be flat, clean, and thick enough. Thin coatings over hard steel can read artificially hard because the durometer foot “feels” the substrate underneath. As a practical rule, test on a built-up sample, a thick edge, a molded puck, or stacked material where possible. The exact minimum thickness depends on the durometer standard and compound, but thin field films are often poor candidates for direct hardness acceptance.
Take repeat readings. One poke means very little. I usually want several readings across the area, avoiding bubbles, edges, seams, fabric laps, and obvious defects. Hold the gauge square, apply steady pressure, and read at the specified dwell time if the project calls one out. Rubber creeps under load, so a reading taken instantly may not match one taken after a few seconds.
A liquid rubber coating can feel dry on the surface while remaining under-cured below the skin.True
Skin-over can occur in about 30 minutes to 4 hours depending on chemistry, thickness, humidity, temperature, and airflow, while full cure often takes 24 hours to 7 days or longer for thick sections and cold applications.
Adhesion checks: choose the method to match the risk
Adhesion testing should match the consequence of failure. A small non-critical weather seal does not need the same inspection plan as a bund lining, tank base, wastewater channel, or vibration-exposed machine plinth.
Crosshatch testing is useful for thin coatings on firm substrates. Cut the grid cleanly, apply the specified tape, pull at the required angle, and rate the removal. It is quick, but it can be misleading on very elastic rubber because the film stretches instead of cutting cleanly.
Peel testing tells you more about flexible membranes. Start a tab, pull it back, and look at the failure mode. Cohesive tearing within the rubber is usually better than clean release from the substrate. Clean release says surface preparation, primer selection, contamination, or cure compatibility needs attention.
Pull-off testing gives a number and suits higher-criticality industrial work. Bond dollies, cut around them if required, pull to failure, then record both strength and failure mode. The number depends heavily on substrate strength. On weak concrete, you may pull concrete paste off and still have excellent rubber adhesion.
For routine maintenance, a simple edge-lift check has value. Probe terminations, penetrations, corners, and lap edges with a blunt scraper. Do not attack the coating like you are removing gasket material with a cold chisel. You are checking for weak bond, not trying to create damage.
Visual inspection still catches what instruments miss
Walk the job slowly under decent light. A uniform sheen usually indicates consistent application and cure, though some products naturally cure matte. Look for bubbles, pinholes, fisheyes, wrinkles, mud cracking, uncured pockets, sagging curtains, dry spray texture, and edge delamination. Around bolts, drains, pipe penetrations, control joints, and upstands, defects hide in plain sight.
Bubbles often point to outgassing concrete, trapped solvent, high application thickness, heat from sun exposure, or aggressive mixing. Pinholes can come from porous substrate, poor wetting, foam, or spray technique. Mud cracking is a warning sign: the film shrank, skinned, or was applied too heavily for the cure conditions. Wrinkling usually means the top moved differently from the body underneath. None of these improve with optimism.
Acceptance records for industrial work
A sensible acceptance pack does not need to be bulky, but it should be complete enough that a supervisor six months later can understand what was installed.
Typical acceptance language should cover:
| Check item | Practical acceptance expectation |
|---|---|
| Cure record | Application date, release-to-service time, and any extended cure period recorded |
| Ambient conditions | Temperature, relative humidity, substrate condition, dew point risk, and ventilation noted |
| Material traceability | Product name, batch numbers, expiry status, mix ratio if applicable, and primer used retained |
| Thickness | Wet-film readings during application and dry-film readings or witness panel checks verified against specification |
| Hardness | Durometer readings taken on suitable thickness or sample areas where hardness is part of acceptance |
| Adhesion | Edge-lift, peel, crosshatch, or pull-off results acceptable for the project criticality |
| Repairs | Defects cut out, cleaned, recoated, cured, and rechecked before handover |
The operational warning is simple: do not put the system into service early because production wants the area back. Sometimes that pressure is real. Still, exposing under-cured rubber to water, oil, foot traffic, forklift tires, chemical washdown, or negative pressure can turn a small cure delay into scraping, rework, and another shutdown window. That is an expensive way to save half a day.
Frequently asked questions
Does liquid rubber dry hard or stay flexible?
Most liquid rubber products cure into a flexible elastomer, not a rigid shell. “Hard” in rubber terms usually means it has stopped flowing, stopped transferring to your glove, and developed enough tear strength to work. It does not mean it becomes brittle like acrylic sheet or PVC pipe.
A roof-grade waterproofing membrane may cure soft enough to move with sheet metal, concrete cracks, or timber movement. A casting rubber or industrial repair compound may cure much firmer. The common working range is roughly Shore A 10 to Shore A 90, depending on the polymer chemistry, filler package, cure system, and film thickness.
Can liquid rubber become as hard as plastic?
Usually, no. If you need plastic-like rigidity, buy an epoxy, polyurethane casting resin, polyester resin, or thermoplastic part. Liquid rubber is selected because it bends, seals, absorbs vibration, or releases molded parts.
There are firm rubber compounds near Shore A 80–90 that feel quite stiff in the hand, especially in thick sections. They can be hard to dent with a fingernail. Still, they behave differently from plastic under load. They compress, rebound, and creep over time. That difference matters on a machine guard edge, a pump base pad, or a mold liner.
A cured liquid rubber coating can be hard enough for service while still remaining elastomeric.True
Rubber hardness is measured differently from rigid plastic hardness. A cured rubber can resist indentation and traffic but still stretch, recover, and seal movement.
How long before liquid rubber is no longer sticky?
For many coatings, the surface skins over in about 30 minutes to 4 hours. That range depends heavily on chemistry, wet film thickness, temperature, humidity, and airflow. A thin coat on warm steel with decent air movement may stop feeling tacky the same shift. A thick ponded area in a cool corner can stay gummy overnight.
“Not sticky” is not the same as “ready for service.” Full cure is often somewhere from 24 hours to 7 days. Thick castings, enclosed joints, low-temperature work, and solvent-rich layers can take longer. I have seen maintenance crews lose a repair by putting a pump drip tray back into service because the surface looked dry, while the underside was still soft.
Why is my liquid rubber still tacky after 24 hours?
The usual causes are too much material in one pass, cold substrate, poor ventilation, wrong mix ratio on two-part products, expired material, contamination, or moisture conditions outside the product’s working range. Oils, release agents, silicone spray, diesel film, and some old bitumen surfaces are common offenders.
Check the simple things first. Was the drum stirred properly, including the bottom corners? Was the catalyst measured by weight or by someone “eyeballing” a cup? Was the slab temperature below the dew point? A rubber coating applied to a cold roof deck in the late afternoon can see condensation before anyone notices.
Can I speed up liquid rubber curing with heat or a fan?
Sometimes, but do it carefully. Gentle airflow helps many water-based and solvent-based coatings because it carries away moisture or solvent. Heat can also help if the product data sheet allows it and the substrate warms evenly.
Do not blast it with a torpedo heater at close range or trap solvent under a prematurely skinned surface. That creates bubbles, wrinkles, soft pockets, or a surface that looks cured while the body is still weak. In practice, low, even heat and clean air movement beat aggressive heat every time. Watch combustible vapors with solvent systems; that is not a paperwork warning, it is a real plant-floor hazard.
Can I paint over cured liquid rubber?
Yes, if the coating system allows it and the rubber is fully cured, clean, and compatible with the topcoat. Some liquid rubber membranes accept acrylic or polyurethane topcoats. Others reject paint, stay too flexible, or contain surface additives that cause poor adhesion.
Do a small adhesion test before coating a whole roof, tank bund, or machine base. Light abrasion and solvent wiping may help, but the solvent must not swell the rubber. If the topcoat cracks while the rubber stretches beneath it, the finish will fail even though the rubber itself is doing its job.
Is thicker liquid rubber stronger?
Not automatically. Thicker rubber can improve waterproofing margin, abrasion life, and crack-bridging, but only if it cures through properly and bonds to the substrate. Too thick in one coat can trap water or solvent, extend cure time, sag on vertical faces, and leave a weak center.
A better practice is often two or three controlled coats with the specified recoat window. You get better film build, fewer pinholes, and less guesswork. Wet film gauges are cheap; scrap and rework are not.
How do I know if liquid rubber is fully cured?
Use several checks, not just one. The surface should be non-tacky, uniform in gloss or texture, and free of soft blisters. Press a clean thumb or gloved finger into a hidden area; it should recover without leaving a wet imprint. For thicker sections, cut a small witness sample or edge trimming and check whether the interior has the same firmness as the surface.
On production or contracted work, define acceptance up front: minimum cure time at recorded temperature, dry film thickness, adhesion pull or peel result where practical, and Shore A hardness if the application is critical.
What Shore hardness should I choose for waterproofing, molds, or repairs?
| Application | Typical Shore A range | Practical selection note |
|---|---|---|
| Roofs, gutters, flashing, flexible waterproofing | 20–50 | Softer grades handle movement better; surface protection may be needed for foot traffic. |
| Mold making and casting | 10–60 | Soft rubber releases undercuts; firmer rubber holds shape better on larger molds. |
| Industrial patching, pads, chute liners, edge repairs | 50–90 | Higher hardness improves cut and abrasion resistance, but may reduce flexibility and sealing. |
Pick hardness around the failure mode. If the problem is cracking from movement, going harder may make it worse. If the problem is gouging, dragging, or bolt compression, too soft will fail early. That trade-off is where many cheap repairs turn expensive.
Bottom line: liquid rubber hardens into a designed elastomer, not a generic solid
Liquid rubber does go hard in the practical sense: it changes from a brushable, sprayable, pourable, or trowelable liquid into a solid rubber-like material. But “hard” is a poor purchasing word unless it is tied to the job. One cured liquid rubber may feel like a soft inner tube. Another may feel close to a firm tire sidewall. Both can be correctly cured.
That range is not accidental. It comes from the formulation: polymer type, plasticizer level, filler package, crosslink density, solvent or water content, and cure chemistry. In the field, cured liquid rubber products commonly land anywhere from roughly Shore A 10 to Shore A 90, depending on the system and how it was applied. At the low end, you are buying movement and crack bridging. At the high end, you are buying abrasion resistance, indentation resistance, and better resistance to being chewed up by traffic or tools.
Do not approve it by finger pressure alone.
Specify what the rubber must survive
A thumb test can tell you if the surface is still wet or badly undercured. It cannot tell you whether the coating will handle ponded water, forklift tire scrubbing, chemical splash, UV exposure, thermal cycling, or joint movement. I have seen coatings that felt “nice and tough” on day two tear at a moving seam a month later because the selected grade was too stiff. I have also seen very flexible membranes get shredded on walkways because nobody specified a wear layer.
The better question is not “Will it go hard?” It is “What hardness and cure profile match the service condition?”
For a roof, tank bund, floor repair, machine base seal, pipe penetration, or vibration-prone joint, the right answer may be different. Sometimes softer is the engineered answer. Sometimes it is the problem.
A cured liquid rubber coating can be fully cured and still remain flexible or rubbery rather than becoming rigid.True
Liquid rubber is normally designed to cure into an elastomer. Final hardness depends on formulation and is commonly specified by Shore A value, not by whether the material feels like plastic, metal, or concrete.
Buying criteria that actually matter
Procurement teams tend to ask for price per liter or gallon first. Understandable. Still, the lowest unit price can become expensive fast if cure time, recoat window, substrate prep, or service exposure is wrong. A rejected coating job costs labor twice, and shutdown windows are rarely generous.
Use this checklist before issuing a purchase order or approving an alternate:
| Criterion | What to confirm | Why it matters on the floor or jobsite |
|---|---|---|
| Chemistry | Polyurethane, silicone, acrylic, bitumen-modified, EPDM-type, polysulfide, or other system | Drives adhesion, UV resistance, chemical resistance, odor, cure method, and repair compatibility |
| Shore hardness | Target Shore A range after full cure, tested under the stated conditions | Prevents buying a membrane that is too soft for traffic or too stiff for movement |
| Cure mechanism | Moisture cure, two-part chemical cure, solvent release, water evaporation, or hybrid | Controls pot life, skin-over time, cure depth, weather risk, and production scheduling |
| Substrate compatibility | Concrete, steel, galvanized metal, timber, EPDM, PVC, old coating, asphalt, insulation board | Adhesion failures often start here, especially with dusty concrete, oily steel, plasticizer migration, or unknown old coatings |
| Film thickness | Wet film thickness and expected dry film thickness per coat | Thick films may skin over while staying soft underneath; thin films may cure but fail early |
| Exposure | UV, standing water, chemicals, oils, foot traffic, tire traffic, temperature range | A waterproofing grade is not automatically a floor wear grade |
| Technical data sheet values | Cure time, elongation, tensile strength, tear resistance, service temperature, recoat window, primer requirement | These values are your basis for acceptance, warranty discussion, and supplier accountability |
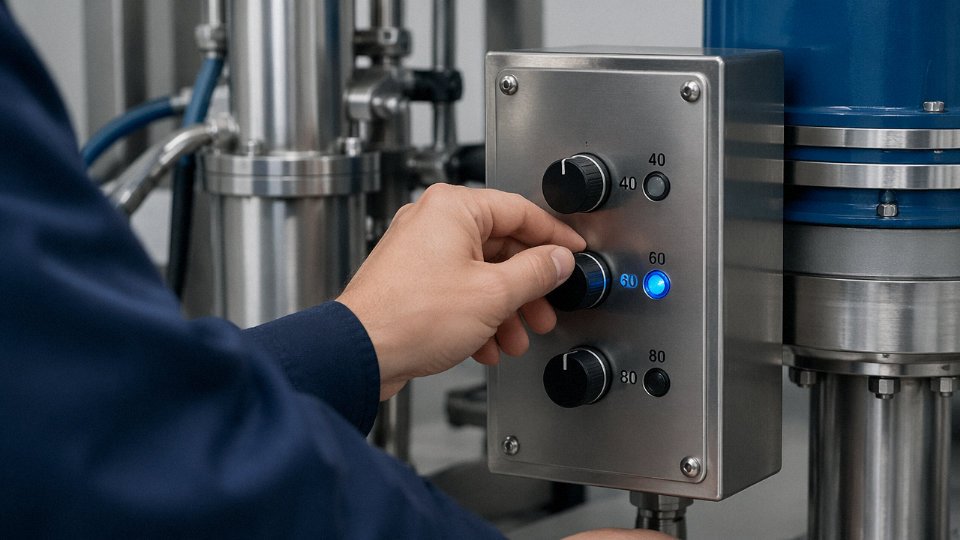
Test a sample before committing the plant, roof, or production line
For small noncritical patching, a good technical data sheet and a known brand may be enough. For industrial work, waterproofing, chemical exposure, food-area secondary containment, electrical areas, or any safety-related application, run a sample panel or a mock-up.
Keep it boring and representative. Same substrate. Same surface prep. Same primer. Same target film thickness. Same ambient temperature range if you can manage it. If the real job will be applied at 8 to 12 °C in a damp corner of a plant, a sample cured in a warm office tells you very little. Seasonal humidity and airflow change cure behavior; so does a concrete slab that looks dry but is still pushing moisture.
A useful trial does not need to be complicated. Apply a measured wet film, record the temperature and humidity, check skin-over, check tack after 24 hours, then cut a small cross-section later to see whether the body of the film cured through. If hardness matters, test Shore A after the supplier’s stated cure window, often somewhere from 24 hours to 7 days depending on chemistry, thickness, and temperature. For heavy builds or cold applications, expect longer.
One practical warning: do not let the crew “improve” the product on site with random thinner, cement powder, extra catalyst, diesel-contaminated tools, or leftover solvent from another job. That sort of improvisation may make the material easier to spread for ten minutes and ruin it for ten years.
The working rule
If the job needs movement, sealing, vibration tolerance, waterproofing, or crack bridging, flexibility is not a weakness. It is the reason to use liquid rubber.
If the job needs wear resistance, pallet traffic, tire contact, tool impact, or regular cleaning abrasion, specify a harder grade or a compatible protective system over the flexible layer. That may mean a trafficable topcoat, embedded reinforcement, aggregate broadcast, a harder polyurethane wear coat, or a different material entirely.
Liquid rubber hardens, yes. The correct specification decides whether it hardens into the right elastomer for the job.